Color WordPress Theme
Theme Documentation
- Version:
- 1.0
- Last Update:
- Dec 7, 2015
- Created By:
- ThemeintheBox.com
Thanks!!
The scope of this documentation file is to provide you with the information you need to help you get started with your new theme. From the first steps of installing the theme, to creating custom pages and styling the whole thing for your needs.
Should you have any questions that are beyond the scope of this help file, please feel free to post them to on our Support Click here.
Getting Started
Theme Files
Assets
- dummy_data.xml
- Contains an XML file that you can import into your WP instance to populate your site with dummy data.
Documentation
Contains the current help file that comes with the theme.
License
Licensing information files.
Theme Files
- color-wp-theme.zip
- It contains the core files to install the theme.
- color-wp-child.zip
- It contains files to install the child theme.
Theme Requirements
In order to proceed with the theme installation, you need to make sure you have the latest version of WordPress (3.8+) on your self-hosted site.
Click here to read more about what you need to run WordPress on your host.
Theme Installation & Configuration
Step 1: Theme Installation
Upload via ftp:
Upload via Wordpress admin:
Upload via Wordpress admin:
Once you have uploaded the theme, activate your theme in Appearance > Themes.
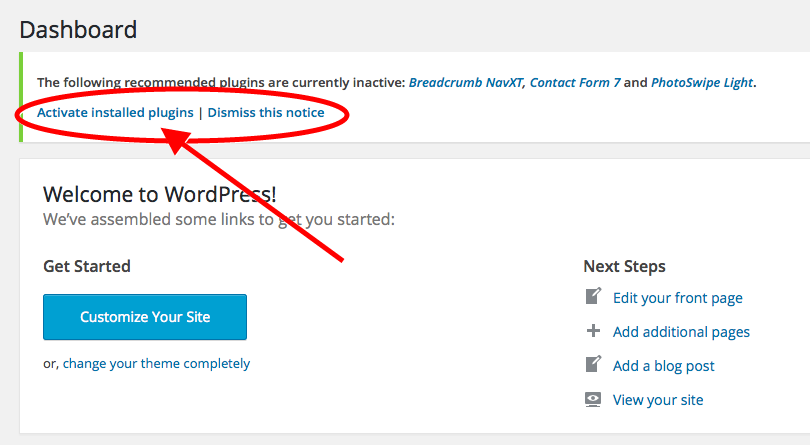
Step 2: Plugin Installation
A notice at the top of the screen will now suggest to continue with the recommended plugins installation. Click 'Begin installing plugins' and select the plugins you need to install from the list. All plugins must be activated once the installation has finished.
Required Plugins:
- Breadcrumb NavXT
- Adds a breadcrumb navigation showing the visitor's path to their current location.
- Contact Form 7
- Just another contact form plugin. Simple but flexible.
- PhotoSwipe Light
- A very light implementation of PhotoSwipe javascript plugin for WordPress.
Step 3: Dummy Data Import
The theme comes with a .xml file containing demo content you can import into your WordPress site to populate your database. This will help you get started, in case you are running on a fresh WordPress installation with no content at all.
The XML file includes Demo Blog Pages, Demo Blog Posts, Demo Homepages, Demo Comments, etc. The XML file does not include any.
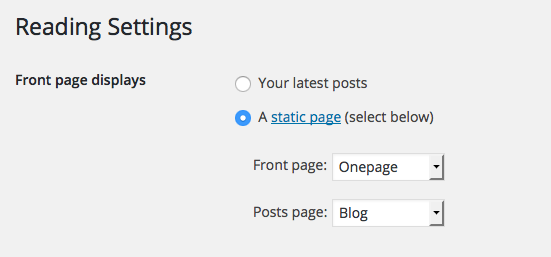
Step 4: Setting Front Page
After loading the dummy file, set the home page.
Settings > Reading > Front page displays: A static page
and select
Menu
Color WordPress Theme may have two menu simultaneously, one exclusively for the page template OnePage and another for all other pages.
The main menu will be selected as the Main Menu like Theme Location
Setting up the menu
These are the default steps that you need to do in order to setting up the menu:
- Go to Appearance > Menus
- Select "Create a new menu" at the top of the page
- Enter a name for your new menu in the "Menu Name" box and click the "Create Menu" button
- The menu is now setup and needs pages to it
- Locate the pane entitled "Pages"
- Within this pane, select the "View All" link to bring up a list of all the currently published Pages on your site
- Select the Pages that you want to add by clicking the checkbox next to each Page's title
- Click the "Add to Menu" button located at the bottom of this pane to add your selection(s) to the menu that you created in the previous step
- Click the "Save Menu" button in the Menu Editor to save your changes
Your custom menu has now been saved.
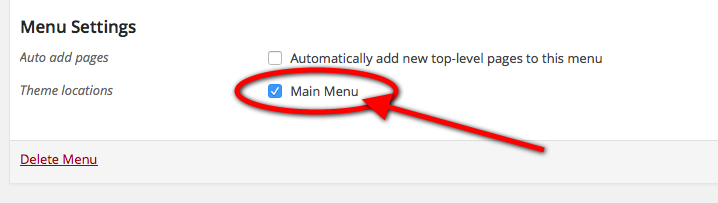
- Scroll to the bottom of the menu editor window
- In the section titled "Theme locations", click the check box for the location where you want your menu to appear
- In this case the only area is the "Header menu
- Click Save menu once you've made your selection
Congratulations! Your new custom menu has now been added to your site.
Detailed instructions on creating a menu are located on the WordPress website here - http://codex.wordpress.org/WordPress_Menu_User_Guide
OnePage Menu
To get the effect scrolling, create a new menu:
- Apparence > Menus > Create a new menu

- choose a name and click Create new menu
- From left bar choose Custom Links and enter the names of the sections
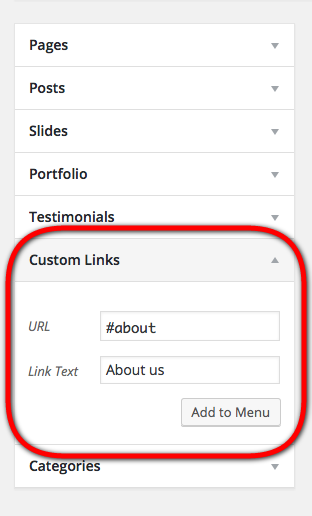
- TOP: #home
- ABOUT: #about
- FEATURES: #features
- SERVICES: #services
- PORTFOLIO: #portfolio
- CONTACT: #contact
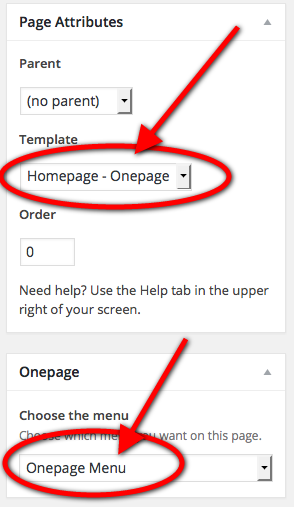
To select the exclusive menu for the page template OnePage, select:
- Pages > choose the page to become OnePage
- Now select OnePage as page templates (if not already selected)
- From the menu bar on the right, choose the menu that you want to associate with this page.
Theme Settings
Color WordPress Theme includes 2 areas Settings to better manage the theme options: an area of general settings and the exclusive for OnePage.
Theme General Settings
In the Theme Settings, you can control the general aspects of the topic, such as:
- Header
- Footer
- Blog
- Social
- Custom codes
OnePage Settings
In this settings menu you can check all sections of OnePage. You can turn on / off each section, check the images, titles and text directly from the control panel of WordPress.
© ThemeintheBox.com